Hello… it has been a while…. anyway let’s get back in business.
As a fellow guitar player I’ve always been a fan of bass foot pedals, like the famous Moog Taurus (Rush, Malmsteen, etc.). I was trying to find an affordable alternative (e.g. Roland PK-5,), however those are really expensive (Tauruses are over 1000$us, Pk-5’s around 400$ if you find one, etc.).
Thus, I decided to go the DIY way… This idea (DIY Taurus) is not new at all (e.g. here)… but most of the solutions involve recycling old physical keyboards or hijacking/stripping pedalboards (I live in Bolivia now and it’s unlike you can find old spare parts easily).
So.. one day I’ve read this wonderful post on the Caustic App site of how you can “hack” Caustic to use a QWERTY USB keyboard with it on Windows and Mac (BTW…”Caustic is a music creation tool inspired by rack-mount synthesizers / samplers rigs. Everything is real-time and optimized for mobile devices…”).
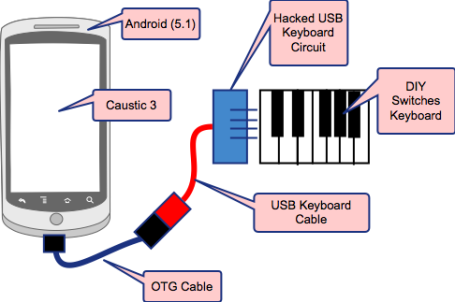
Fortunately this hack also works like a charm in Android Devices (iOS ones could work as well, using a Bluetooth keyboard instead). So, as we can indeed branch a USB keyboard to Android via a simple OTG cable, I thought that by “hacking” the USB Keyboard (wiring it differently, as described here and here) you can build your own “variation” of the keyboard.
So here’s the schematics for this easy hack:
Interested? This is a wonderful piece of gear for musicians!! Here the details of how I made it (around 3 days and 25$us in materials):
Software
I’m using a Moto X (1st) with Android Lollipop 5.1… but basically this should work in any Android Version that supports Caustic App.
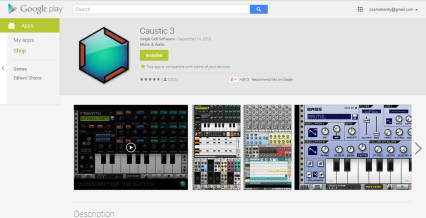
Of course, I’m using the amazing Caustic App. This is an outstanding app.. and this keyboard hack works even with the free version! I was not able to find a similar app that interact with a USB Keyboard. Caustic covers all the aspects related to sound generation (it has pcm synths, samplers, vocoder, a modular synth, sequencer, etc… so sound-wise it has it all).
Hardware
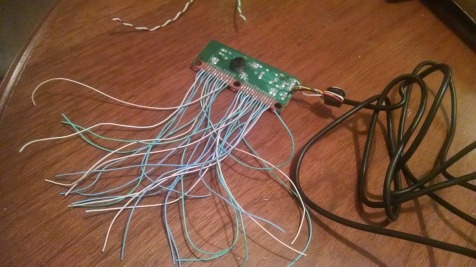
You need an OTG cable (around 2$US). And also you will need a standard USB QWERTY keyboard you don’t use anymore, as you are going to fully dismantle it. We need to disassemble the keyboard as we just need the USB Cable and its PCB (the internal printed circuit board of the keyboard). Then, as described here you will need to “extend” the PCB with your own wiring. Basically you extend each of the PCB pins with a corresponding cable extension. An image worths a million words (English is not my native language BTW):
This is the most tricky part (I must admit my soldering skills suck!, I ruined 1 PCB in the process…).
HINT: For the extension cables use stranded ones, they won’t break as you may need to -eventually- manipulate the PCB for the connections (yeah… I know, we can improve this).
Once you are at this stage you can already branch the USB Keyboard to Android and test the key combinations. This is the mapping for the keys / notes from the man himself REJ-DEV, the genius behind Caustic.

Mapping Keys / Notes / Functions
Pretty easy right? Just find the good pin combination to trigger a specific key. For this project, as I’m interested mostly in a-la-moog tones I was focused in this mapping:
Z =C,
S=C#,
X=D,
D=Eb,
C=E,
V=F,
G=F#,
B=G,
H=Ab,
N=A,
J=Bb
M=B
Also, I was interested in mapping the PLAY Key (e.g. you can play a sequence or pattern in Caustic, WOW!!!). That function is mapped to the SPC (Escape key to pause/start). It’s important to remark that the PgUp and PgDb are very useful as well (will switch the current octave).
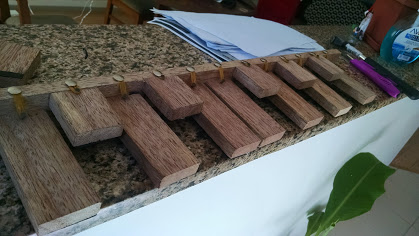
Ok, now that we have the list of keys we’re interested into, we need to build the triggers/switches that will act as keyboard keys (e.g. the controller itself). For this, I thought it will be nice to have something that resembles a real keyboard. As in Bolivia we have plenty of wood.. I used a wooden design… I just asked a local carpenter to cut the “keys” and the “frame” of the wooden keyboard, here’s the idea:
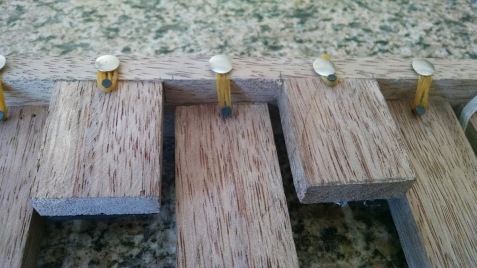
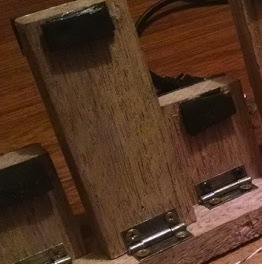
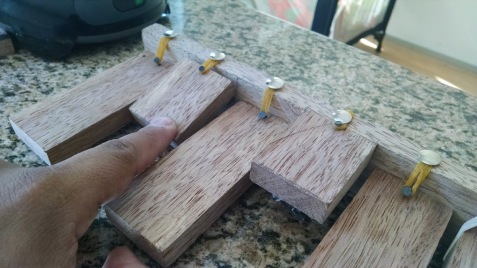
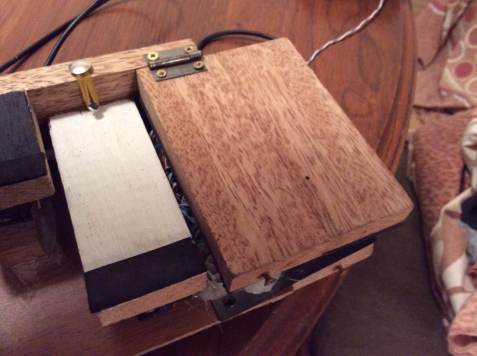
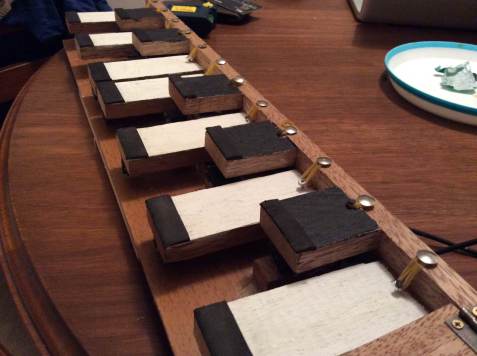
I asked the carpenter for 8 standard keys (10cm x 4cm x 2cm) and 5 flat/sharp ones (5cm x 4cm x 2cm), plus a wood frame (55cm x 4cm). The assembling is, IMO, very interesting and CHEAP!, just using a thumbnail and a rubber band for the “pressing” mechanics, and for the joints I used standard hinges… believe me.. it just works quite well (I know people often uses springs… but this just worked… K.I.S.S):
Ok, the keys “push” mechanics were solved at this point. Now need to continue with the wiring and the actual “switches”. The switches basically will make the contact of 2 pins of the PCB, simulating a keystroke.
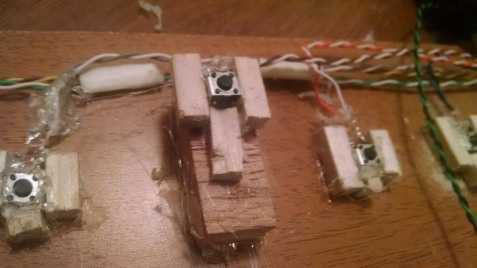
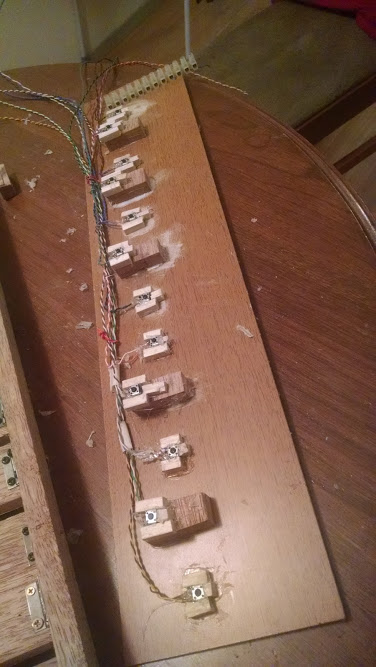
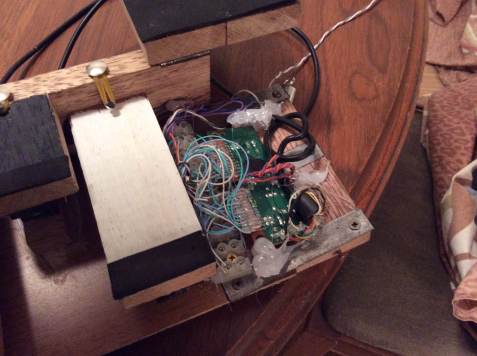
I’m really BAD in handcrafting, so please do not laugh on my “glue-ing” skills here.., I’ve used small switches as triggers, each one mapping a specific keys (Z, S, X, etc..)
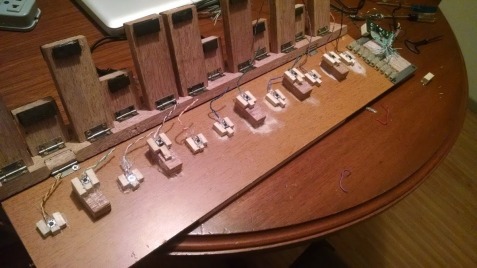
I’ve put all the switches over a plywood piece (around 55cm x 12cm)
Voila! I also joined the key wood frame with the plywood also with a hinge. I’m a Computer Science fellow, and I understand the need of “testing”, so obviously if things go wrong I have a chance of reviewing the circuitry and connectors without disassembling the whole thing.
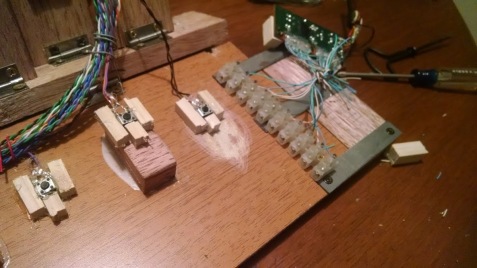
For the connections between switches and the actual pins extension I used a “bridge” to minimize PCB manipulation and ease the wiring:
I ended up without space for the PCB!!! So I need to improvise and “extension” (an ugly error I know… it happens in software too):
and here.. the keyboard finished and painted:
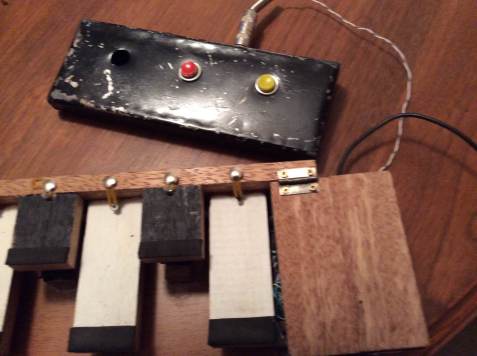
I’ve also forgot about the SPC key… or not? I thought it was better to have “special functions” outside the keyboard (following the SoC principle), so I ended up with an external trigger for the SPC (Pause/Play sequences), I used an old DIY switch I made, just a switch that is wired/mapped to the SPC key (just the yellow trigger at this time):
Ok.. but does it work???? Hell yeah! I’ve used that even in a live concert (will post footage soon). Right now, I just have these 2 basic videos (crappy camera audio and neighbor’s dogs are barkin’… ):
Example 1: Rush’s Tom Sawyer Growl… there’s no latency BTW (the sample has a special setting in the attack… also I didn’t press properly due to the filmin’…). Certainly Caustic reacts immediately to the USB keystrokes (e.g. better than MIDI triggering I assume),
Example 2: This is an intro from a song of my favorite Bolivian band Track, it helps to illustrate the external triggerin’ (sorry it was hard to film and press buttons at the same time… out of beat … a better video to come once I find a stand or somebody around to film)
Improvements
What I did is a just a nice PoC of what can be done, it can be improved in several ways:
- Adequate dimensions on the keys,
- More robust design (to support a gig at least),
- More space for the PCB, or even better, a separate module for the PCB (e.g. interfaced with RJ45 connectors),
- Use a Bluetooth Keyboard instead… will be easier to manipulate (less cabling),
- Implement triggers for the LEFT and RIGHT keys, so we can also switch “programs” (sounds) in Caustic,
- Creating a real MIDI CONTROLLER with this same technique is just doable as well!!!,
- Proper wiring (It’s a mess as it is… but it works hehe).
Acknowledgements
- Kudos to REJ DEV for his wonderful APP. Thanks to the PCB wiring info sources as well.
- Thanks to my beloved wife and children for their patience (3 long nights in a row in the making…).
- Thanks to you all for visiting this –kinda abandoned– blog.
Your comments are highly appreciated! I’ll try to post a decent video soon.
Greetings from Bolivia.
Javier a.k.a. Rocamatics
